 |
 |
 |
Installing KStars on an Odroid N2
These instructions were written after-the-fact, so there are errors and omissions.
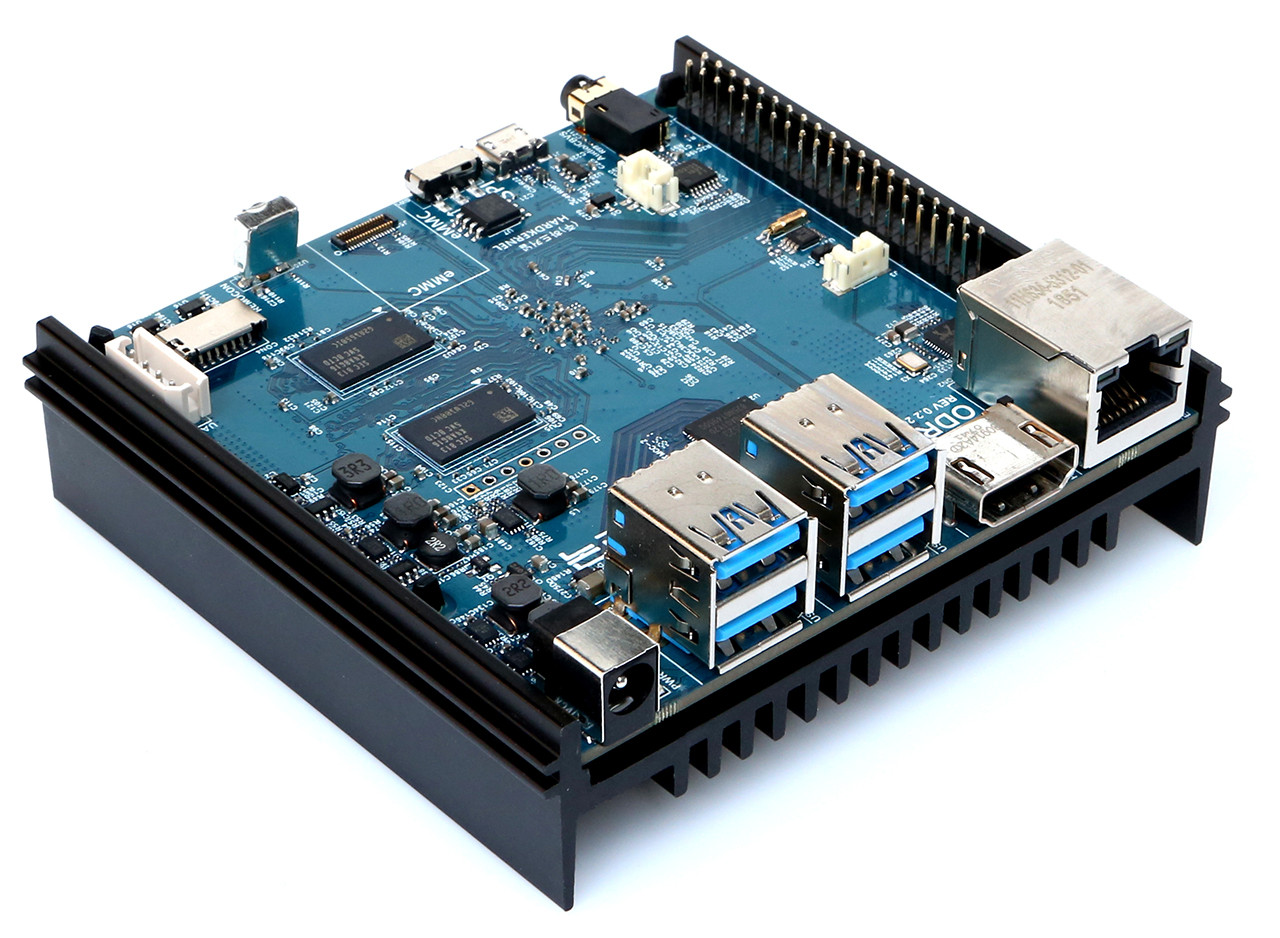
- First off, acquire an Odroid N2 microprocessor [N2] (created by https://www.hardkernel.com) (in my case from https://ameridroid.com with 4G RAM and 32 GB eMMC memory). This is a 6 core Raspberry Pi "clone". Actually, this isn't possible. This model has been replaced with the upgraded Odroid N2+ with A73 cores running at 2.2GHz (formerly 1.8GHz on the N2) without thermal throttling at normal room temperatures using the stock metal-housing heatsink. The CPU's multi-core performance is around 22% faster than the original N2 which itself was faster than the RPi4 (the eMMC helps).
- Other hardware: USB 3 WiFi stick (e.g. ameridroid.com wifi-module-5), an eMMC module writer USB adapter https://ameridroid.com/products/usb-3-0-emmc-module-writer, and case. A external SSD is optional and provides faster imaging I/O. A USB GPS dongle optionally allows for automatic time/date/location data for KStars. An external USB hub may be required depending on the number of USB devices you want to attach.
- Download the latest Ubuntu distribution https://wiki.odroid.com/odroid-n2/os_images/ubuntu/20210126 with Ubuntu MATE 20.04 LTS (v3.1) and write this to the eMMC card using ApplePi-Baker (or Etcher) via a eMMC module writer USB adapter on the user computer (my MacBook Pro).
- Insert the eMMC card onto the N2. Make sure the boot select switch is set to boot from the eMMC.
- After connecting the N2 to an HDMI display, attaching a keyboard, mouse and providing an ethernet cable link to the home router, power up the N2.
- With the ethernet connection download NoMachine Remote Desktop software, the ARMv8 DEB installation and install that on the N2. I chose this approach based on discussions on https://www.indilib.org/forum/recent.html. If you don't want to use this software, the AstroPi3 installer script will install alternatives (below).
- With NoMachine running as a Remote Desktop server disconnect the HDMI, keyboard and mouse and access the N2 via an installation of NoMachine (on the MacBook Pro) (a N2 reboot permitted the Remote Desktop to be reconfigured to a lower readable pixel density).
- Downloaded Rob Lancaste's excellent AstroPi3 installer script from GitHub - rlancaste/AstroPi3. This script automates the many setup steps involved with configuring a Raspberry Pi 3b, 3b+, 4 or similar single board computer (SBC) running Ubuntu or Raspbian, so that it can be an Astrophotography hub using INDI, KStars, and Ekos. Follow the instructions on that GitHub page (some of the steps are already completed above) and run the script to install the astronomy software.
sudo ./setupUbuntuSBC.sh - When that is completed, launch KStars to complete the initialization of KStars and test it using the telescope simulators.
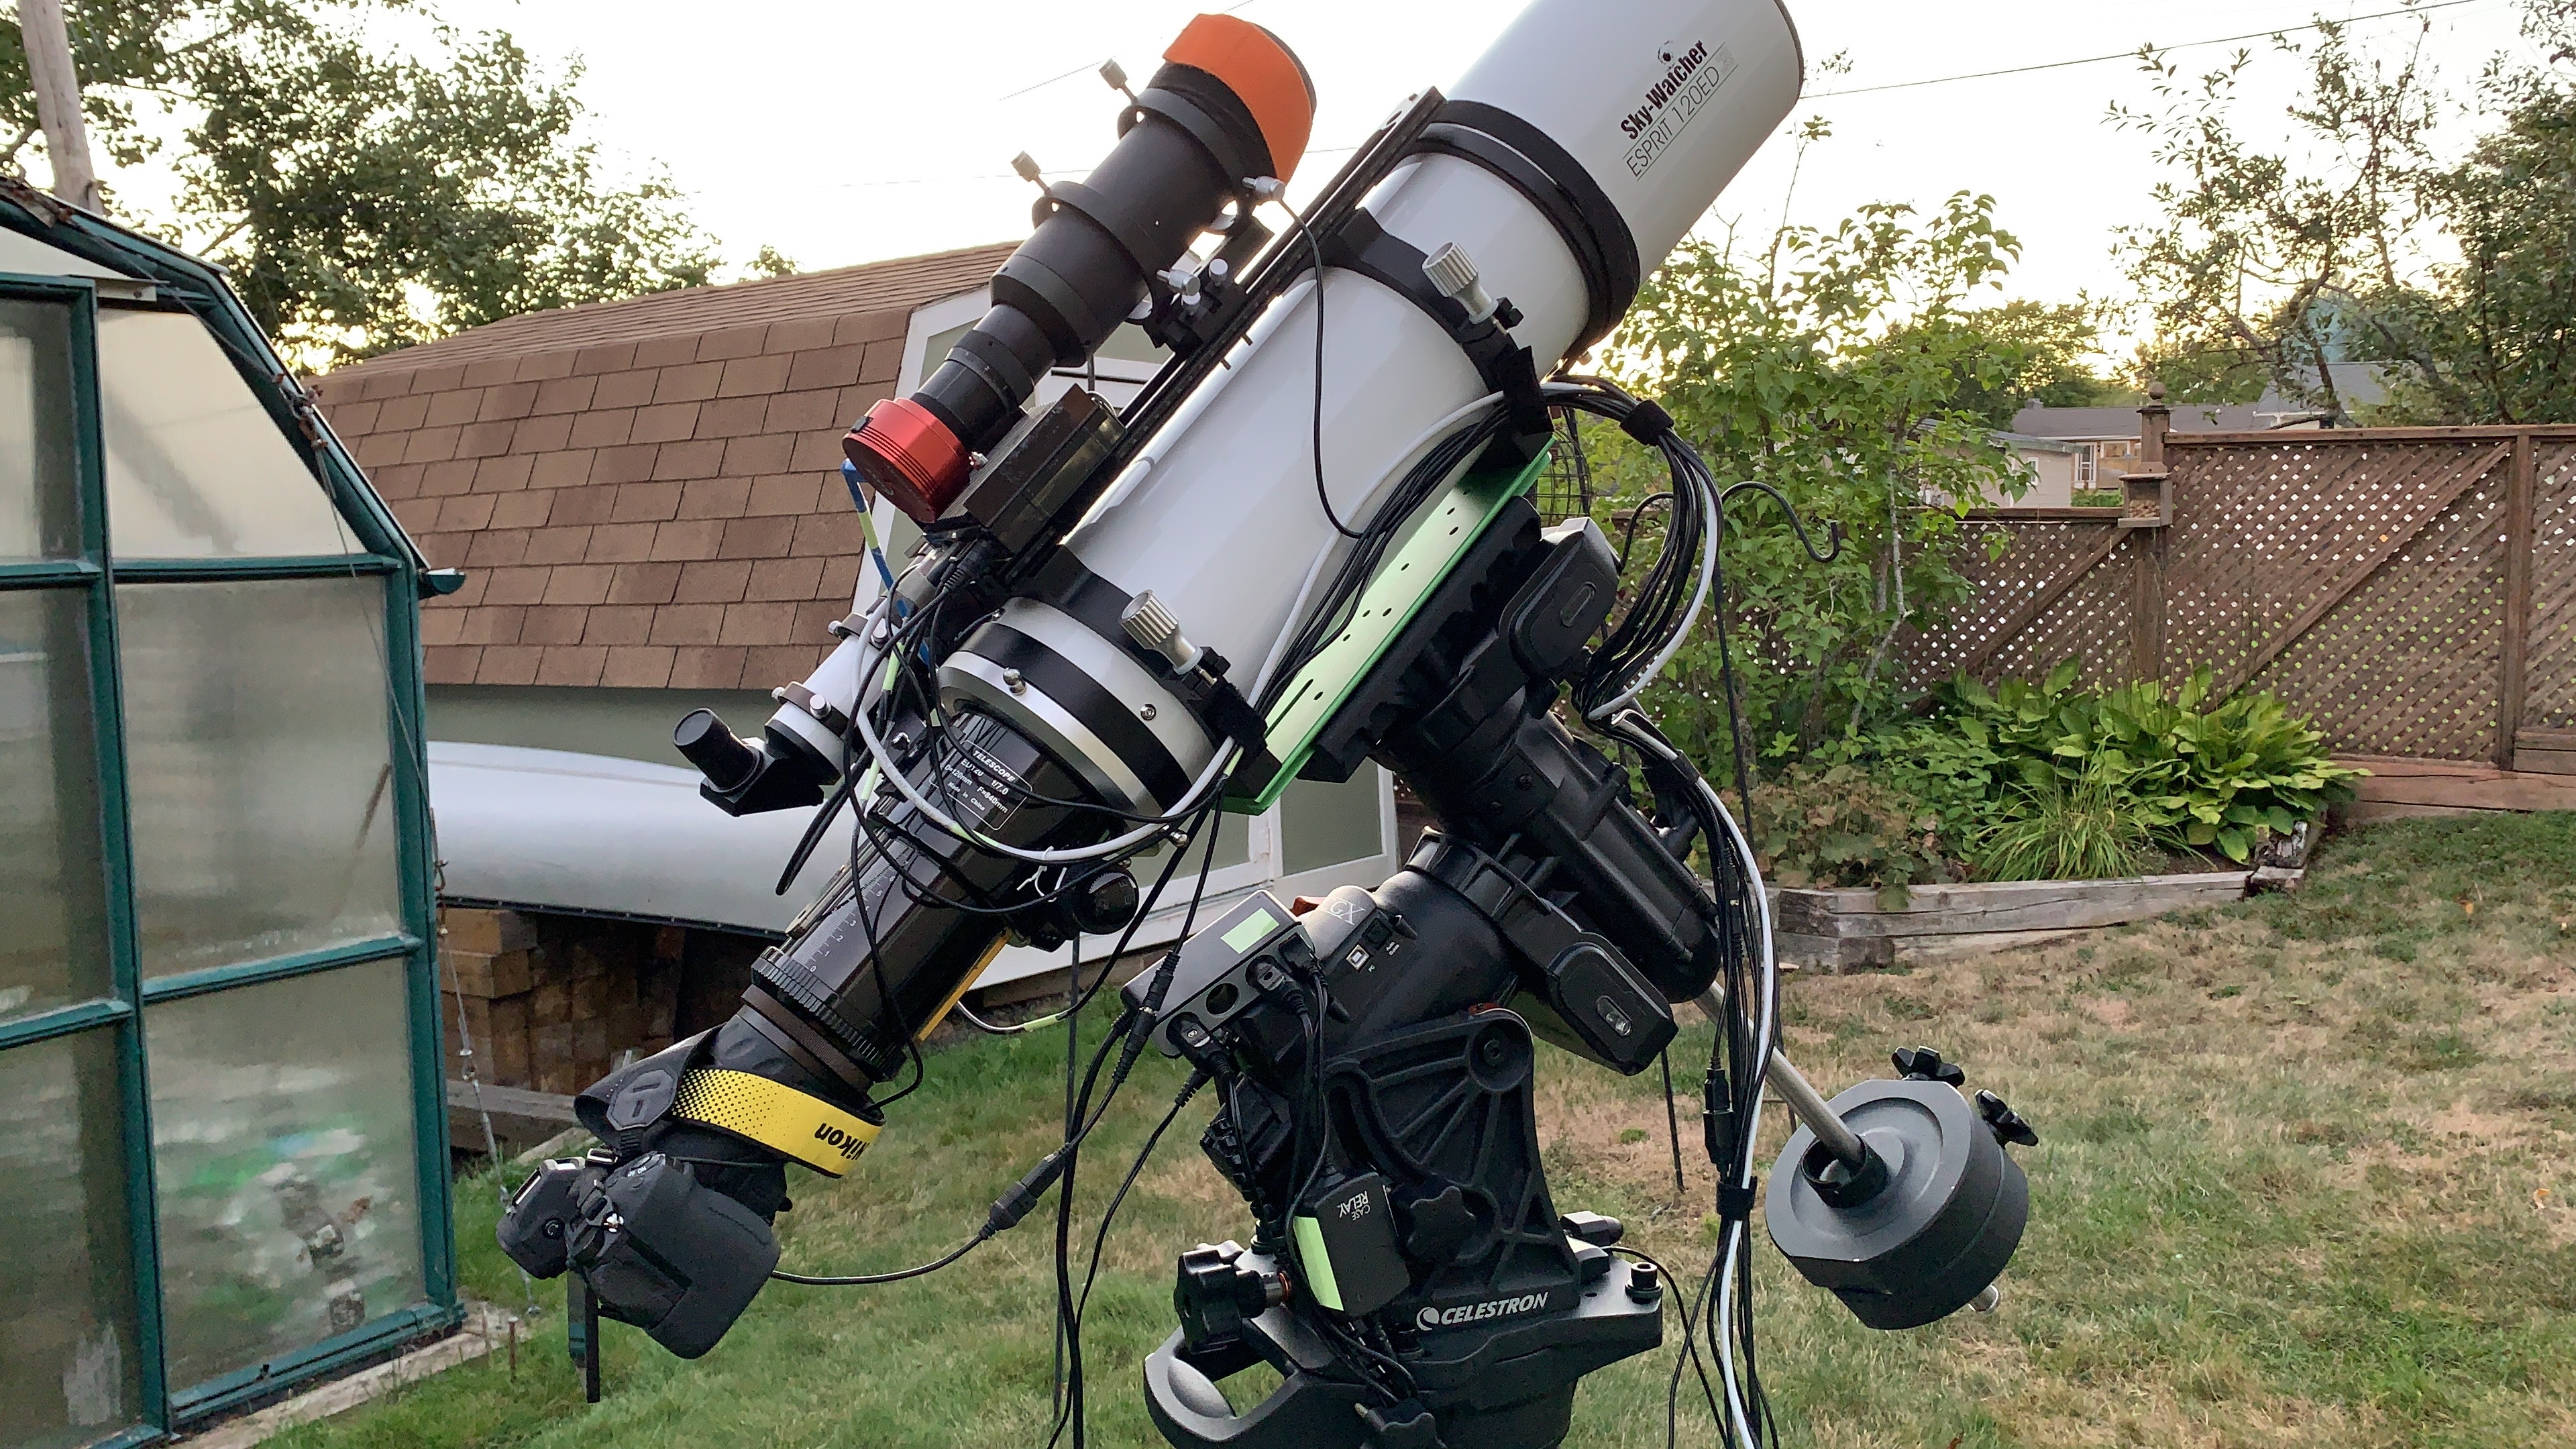
- Connect your physical telescope equipment to the N2 and create a new Profile in EKOS containing the matching drivers for each of your devices. In my case I have a Celestron CGX mount, Pegasus Astro FocusCube V2 focuser, ZWO ASI224MC guide camera (on an Orion 60x240mm guide scope), Nikon Z7 DSLR, Samsung T5 1T external SSD, and either a ethernet wired connection or USB WiFi.
- If you have insufficient USB 3 ports you require a hub for the OTG port to provide additional ports e.g. MakerSpot Accessories 4-Port Micro USB OTG Hub.
- For backyard usage I'm able to use a TP-Link TL-PA9020P KIT AV2000 Powerline Adapter Kit to provide ethernet over power to the N2.
- Download the Astrometry.net Index files (to allow StellarSolver to plate solve) via the Solver Options Index Files dialog. I chose to update files at the predefined Location: /home/odroid/.local/share/kstars/astrometry. There are check boxes that allow KStars to download these files for you. You don't need to download the most detailed (largest) indexes, depending on the Field of View of you scope/camera.
- Generate an Artificial Horizon polygon for the KStars desktop planetarium to provide a visual indicator of your unobstructed view. Settings -> Artificial Horizon... I had previously generated (on an earlier install of Ubuntu) an Artificial Horizon polygon. This was saved to a CSV file for re-use. That's not easy to do in KStars (i.e. impossible). To provide access/editing of this polygon, download DB Browser for SQLite see https://sqlitebrowser.org/dl/.
Using this app on the N2, open the SQLite database containing the polygon data. The database is: /home/odroid/.local/share/kstars/userdb.sqlite. Be careful. You might want a backup of this in case you make a mistake. Open the horizon table in that database corresponding to what you created inside KStars. Edit/Add/Modify that table using DB Browser for SQLite as necessary. You can import a previously saved csv file of coordinates. Note the polygon must be closed and likely should contain a number of 0 Alt values to force the polygon to the ground as it returns to its starting point.sudo add-apt-repository -y ppa:linuxgndu/sqlitebrowser sudo apt-get update sudo apt-get install sqlitebrowser - I my use case, I use Phd2 (included) for guiding and have a profile configured for this scenario.
- After noticing some warnings about missing locale during the software updates, I ran
to set up my locale for my language/country e.g. en_CA.UTF-8. (A reboot was required to have locale show the updated info)sudo dpkg-reconfigure locales sudo localectl set-locale LANG=en_CA.UTF-8
Installing Source code version of KStars
The 1st step is from https://github.com/KDE/kstars
Debian/Ubuntu
Install QTCreator on Ubuntu 20.04 / 18.04
Basically, there are two ways to install QTCreator on Ubuntu 20.04/ 18.04. The first is through the main distribution repositories. If we want to develop calmly sacrificing a little the new features of each version, the ideal is to choose this method.
So, open a terminal and run the following:
sudo apt install qtcreatorOf course, that is the only way to install the IDE, but if we do not install the necessary libraries and compilers, it will not do us any good. So, install them.
sudo apt install build-essentialIf you have multiple versions of Qt, you probably want 5 to be the default QTCreator version to use. To do this, install the following package.
sudo apt install qt5-defaultThen we can begin to develop. However, it is convenient to install the QT documentation and its examples to help the development.
sudo apt install qt5-doc qt5-doc-html qtbase5-doc-html qtbase5-examplesNow you can start QTCreator and start working.
The apt-add-respository command is needed for the apt-get's libstellarsolver-dev. Alternatively, you can skip the apt-add-repository, remove the libstellarsolver-dev from the apt-get, and build & install stellarsolver from https://github.com/rlancaste/stellarsolver.
sudo apt-add-repository ppa:mutlaqja/ppa
sudo apt-get -y install build-essential cmake git libstellarsolver-dev libeigen3-dev libcfitsio-dev zlib1g-dev libindi-dev extra-cmake-modules libkf5plotting-dev libqt5svg5-dev libkf5xmlgui-dev libkf5kio-dev kinit-dev libkf5newstuff-dev kdoctools-dev libkf5notifications-dev qtdeclarative5-dev libkf5crash-dev gettext libnova-dev libgsl-dev libraw-dev libkf5notifyconfig-dev wcslib-dev libqt5websockets5-dev xplanet xplanet-images qt5keychain-dev libsecret-1-dev breeze-icon-theme
Compiling
Open a console and run in the following commands:
mkdir -p ~/Projects
git clone https://invent.kde.org/education/kstars.git
mkdir -p kstars-build
cd kstars-build
cmake -DCMAKE_INSTALL_PREFIX=/usr -DCMAKE_BUILD_TYPE=RelWithDebInfo ../kstars
make -j3
sudo make install
To run KStars, simply type kstars in the terminal.
A shell script to automate Installing Kstars/Indi from their git repositories
This is a more recent attempt at generating a bleeding edge version by using the source code repositories on git.